Light sour cream cake with fruits. Sponge cake with fruit and sour cream cake Sour cream and fruit cake recipe
What could be tastier than a piece of homemade cake for dessert with soft biscuit cakes, sour cream-jelly layer and fresh fruit. Not a single member of your family will refuse such a delicacy. Sponge cake with sour cream is light, tender, and fresh fruits give it a special piquancy.
Ingredients for a cake with a diameter of 25 cm
for biscuit:

- flour - 1 glass
- chicken egg - 3 pcs.
- sugar - 1 glass
- baking powder - 1 tbsp. spoon
for sour cream:
- sour cream - 1000 ml
- sugar - ½ cup
- gelatin - 2 packs (25 g each)
For filling:

- orange - 2 pcs.
- banana - 2 pcs.
for impregnation:
- syrup (raspberry, cherry, etc.)
for glaze:
- cocoa powder - 2 tbsp. spoons
- sugar - 2 tbsp. spoons
- butter - 50 g.
Cake recipe
Make a biscuit. To do this, beat the eggs into the container. And here are a few secrets of successful biscuit preparation: the dishes must be dry, otherwise the eggs may not beat well; eggs for beating should only be taken chilled.
 Beat the eggs with a mixer for at least 10 minutes until they increase in volume. Then, without turning off the mixer, gradually add all the sugar and beat until it is completely dissolved.
 Add flour mixed with baking powder.
 Stir the dough gently. Here is detailed.
 Line the bottom of a baking dish with parchment paper and place the dough in it.
 Preheat the oven to 180⁰C and place the dough pan into it. Do not open the oven for the first 20 minutes, otherwise the biscuit will "fall". Bake the biscuit for about 35-40 minutes. Check readiness with a wooden stick. After the biscuit is ready, turn off the oven, open the door slightly and leave it to cool. After 30-40 minutes, you can take it out of the oven. Remove the sponge cake from the mold, cover with a towel and leave for a few hours.
 Make sour cream. Combine sour cream with sugar.
 Beat everything with a mixer until the sugar is completely dissolved. Pour a little hot water over the gelatin and dissolve it completely. Add gelatin to sour cream. Please note that the cream must be warm (room temperature), otherwise you will form lumps of jelly in the cream.
 Then slice the fruit. Banana and ...
 … Orange.
 Now start collecting the cake. Cut the sponge cake in half lengthwise. Put the bottom of the biscuit in a split form, and saturate it with syrup.
 Then lay out a layer of bananas.
 And an orange.
 Pour half of the sour cream (the second part will come in handy a little later).
 Send the cake to the refrigerator for 30-60 minutes for the cream to harden to a jelly.
 Saturate the second half of the biscuit with syrup and place it on the frozen jelly.
 Pour the other half of the cream over the cake. If you do not have enough height of the form, you can increase it with aluminum foil. Send the cake to the refrigerator to harden completely.
 When the jelly has solidified well, remove the cake from the refrigerator and carefully remove the mold.
 You can stop at this stage, or you can decorate the cake with icing if you wish. Combine cocoa, sugar and butter in a saucepan for the glaze.
 Put on low heat and, stirring, cook until the ingredients are completely dissolved.
- Fill a piping bag, syringe, or cut corner bag with icing and draw a mesh or other custom pattern on the cake. Also brush over the sides of the cake with a brush dipped in icing. Bon Appetit!

Prepared by ANET83.
Ingredients
For biscuit:
- 130 g premium flour;
- 4-5 eggs;
- 130 g granulated sugar;
- 20 g butter for greasing the mold.
For the cream:
- 350 g sour cream;
- 120 g icing sugar;
- 1 bag of vanillin;
- Kiwi, bananas or canned pineapple (rings) - for slicing;
- 1 packet of jelly.
It tastes better with fruit
Melting dough with a minimal set of products and perfectly amenable to impregnation is always the ideal base for complex pastries. The recipe for a delicious sponge cake with sour cream is an example of one of the simplest uses for light sponge dough.
But even such elementary recipes as sponge cake with sour cream have their own secrets, without knowing which you can be disappointed in the result. For example, the choice of fruits. Summer nuances of taste are dictated by domestic fruits and berries.
With our today's biscuit homemade sour cream cake, the flavor nuances of the local harvest dictate: strawberries, cherries, raspberries, blackberries, mulberries. Apples, pears, and other densely textured fruits will not work as they involve baking.
Autumn and winter choices will mainly fall on the foreign fruits presented in the list of ingredients above. Sponge cake with sour cream and bananas will undoubtedly be appreciated by our youngest gourmets. And the subtle sourness of kiwi and the juicy sweetness of pineapple with syrup will appeal to sophisticated lovers.
The second secret is small additions that can give the product originality:
Honey, sponge cake with sour cream is an exquisite delicacy obtained by adding 3-4 tbsp to the list of ingredients for the cake. spoons of fragrant flower honey;
Chocolate sponge cake with sour cream - add 2 teaspoons of cocoa powder to the biscuit recipe, and add 3 tbsp. tablespoons of chocolate paste in cream;

Sponge cake with sour cream and condensed milk - only 4 tbsp. tablespoons of condensed milk, instead of 1/3 of the amount of sugar in the cream, and children will appreciate the new product!
Sponge cake with sour cream step by step recipe
1. Cooking biscuit.

- First, you need to separate the whites from the yolks. We will remove the yolks for now, and we will merge the whites into a bowl for a mixer and beat for at least 5 minutes at high speed. To make the foam stronger and not settle, you need to put the eggs in the freezer for 10 minutes before breaking them. 0.5 teaspoons of lemon juice added to the whites just before whipping will help speed up the result and lighten the dough;
- After obtaining a strong, non-settling mass, carefully add sugar along the edge of the bowl and turn on the mixer again at maximum power. It is easy to determine the readiness of the raw materials for the dough - from time to time you need to scoop up a little sweet mixture with a spoon and try to grind it between your thumb and forefinger. If the grains of sugar are no longer felt, stop beating;
- Separately, you can just use a fork, mix the yolks until completely homogeneous and carefully combine them with the proteins. For mixing, we no longer use a mixer, but a whisk, or the same fork. The main thing is not to repeat the shaking process;
- Mix the flour with soda directly in a sieve and in portions, kneading the resulting batter with a spatula, sift it into a bowl;
- We prepare the form - grease with oil, sprinkle with breadcrumbs or semolina for easier removal. Pour the excess breading and fill the form with dough by ¾ volume;
- In the oven already preheated to 190, set the shape and bake a biscuit cake base with sour cream for about 35 minutes. We do not check the readiness of the cake before the specified time! If you open the oven earlier than 30 minutes after the start of cooking, the biscuit will most likely settle immediately.
- There is no need to pull the cake out of the mold right away - let it stand in the mold, "come off with heat" for about 10 minutes. Then you can tip the mold onto a cutting board and gently tap it with a spatula so that the product separates from the walls and bottom.
2. Prepare jelly for sponge cake with sour cream.

Pour the granules from the bag into a small bowl and fill them with boiling water, reducing the amount of liquid relative to that indicated on the package by 1.5 times. This will make the jelly structure denser and the selected color richer. Otherwise, we follow the instructions.
3. We start making cream for a sponge cake with sour cream. Put the sour cream in a dry mixer bowl and beat it at high speed for 7 minutes, adding a little granulated sugar and vanillin.

4. We collect the cake.
- Cut the fruit into thin circles. If we use canned pineapples, but first they need to drain;
- The cooled biscuit for a cake with sour cream (see photo), which should turn out to be lush and high, cut with a culinary thread into 2-3 cakes. Spread the cream with a spoon, spreading it over the entire surface of the cake, and so - layer by layer;
- Lubricate the very top with a little cream, for impregnation. From fruits or berries, you can combine successful combinations of several types, lay out the composition;
- Cut off a wide, even strip from a sheet of parchment, approximately one and a half times longer than the circumference of the assembled cake and 7-10 cm wide above the level of the top cake. We wrap the cake with this tape and fix the joint well with paper clips so that the jelly does not "run away";
- Pour the cooled gelling mixture in a thin stream, making sure that the entire surface is evenly coated. Carefully, together with a cutting board, on which a sponge cake with sour cream and gelatin was formed, we put our product in the refrigerator. Ideally, for the whole night.

Our quick sour cream sponge cake is ready. As you can see, the process of baking and shaping our miracle, not counting the time for cooling the finished product, took at most 40 minutes.
Secrets of a delicious biscuit
And now - a few basic rules for making a delicious biscuit cake with sour cream:

To knead the biscuit dough, we take dry dishes;
To make the mass fluffy, the whites should be whipped separately from the egg yolks, and then mixed without sudden movements;
To make the biscuit porous, granulated sugar can be replaced with powder;
It is imperative to bake a cake in a preheated oven;
Do not open the oven door during baking, otherwise the biscuit will sag;
It is better to choose fat sour cream for cream, and you need to beat it with a mixer or blender;
So that the cream does not turn out to be liquid, you can pre-hold sour cream under a press to eliminate excess liquid;
A cream with the addition of powdered sugar and banana pulp will turn out to be softer and tastier;
For flavor, vanillin or essence can be added to the biscuit.
One of the most versatile desserts that can be served for any holiday is a sponge cake with fruit and sour cream.
The delicacy is easy to prepare, but despite this, it has a beautiful appearance. It does not lag behind the appearance and taste, you can see for yourself by studying the recipes from this article.
Recipe for a sponge cake soaked in sour cream
No family celebration is complete without dessert. What it will be, you decide, but I propose for this occasion to prepare a delicate biscuit cake decorated with fruits.
The cakes are soaked in sour cream, which is optimal for such baking.
Prepare products from the list:
6 eggs; ¼ packs of oil; 0.2 kg of sugar; 1.5 cups flour. You will need them to knead the dough.
Cake cream is prepared from:
480 ml high fat cream; 250 g sour cream and 70 g icing sugar.
In addition, you will need: a jar of canned peaches and almond leaves.
The cooking process begins with sifting the flour. This step is mandatory, as it allows you to achieve uniformity of the dough and the splendor of the biscuit.
We start to act according to the plan:
- Mash the eggs with sugar, send the mixture to a water bath and stir until thickened.
- Put the mass on the table and, armed with a mixer, beat for 7-8 minutes. You should have a smooth, fluffy mixture that holds its shape well.
- Pour in the sifted flour gradually, stirring the dough with a spatula each time.
- Prepare two round tins to bake the cakes. They need to be covered with parchment so that the cakes come off easily.
- Divide the dough in half and lay out in forms, which are immediately sent to the oven, preheated to 185 degrees.
- After half an hour, remove the finished cakes and cool on a wire rack.
- In the meantime, whisk the chilled cream and add the icing sugar to it. When the mass becomes airy, add sour cream in parts.
- Divide each of the cakes horizontally into two parts and start collecting a sponge cake with sour cream and fruit. Put the first crust on the bottom of the dish, thickly spread it with sour cream, and on top - halves of canned peaches. Alternate layers until you run out of ingredients.
- Decorate the cake with almond petals.
Sponge cake recipe with berries and fruits
A set of products for kneading dough:
one and a half glasses of flour; 220 g sl. oils; a glass of sugar; 4 eggs; 3 tbsp. spoons of milk; 1 teaspoon baking powder.
Prepare cake cream from:
60 g cream cheese; ½ cup full-fat sour cream; ¼ packs of oil; 250 g icing sugar.
You will also need berries and fruits with which you will sandwich the cakes.
Recipe:
- Whisk the softened butter and sugar until fluffy, smooth.
- Drive in all the eggs one at a time until the ingredients are evenly distributed.
- Sift the flour with baking powder and add to the dough after the milk.
- Beat the mass thoroughly and pour into two forms.
- Bake the cakes at the same time, preheating the oven to 170 degrees. Do not open the cabinet door in any case, you can check the readiness of the cakes only after half an hour.
- While the cake is cooling, make sour cream. To do this, combine all ingredients in a bowl and beat until fluffy.
It remains only to soak the cakes and decorate the finished cake with berries. They need to be thoroughly rinsed and dried, but it is not necessary to grind them.
It is important to choose undamaged strawberries or raspberries so that the biscuit has a presentable appearance (see photo).
You can find recipes for baking with strawberries on the pages of the site.
Sponge cake recipe with sour cream and gelatin cream
Strawberries, which are included in the food list, will make the cake colorful and give it freshness.
You need to take:
250 g sugar; 8 eggs; 0.3 kg of wheat flour; 5 ml lemon juice; 1 tbsp. a spoonful of potato starch. From this set, you have to hammer the dough.
For the cream on the cake, prepare:
0.1 kg of fine sugar; 0.5 kg of high fat sour cream; a tablespoon of granulated gelatin and 80 ml of water.
Step-by-step cooking:
- Sift fine flour through a sieve. This will help you oxygenate it and get rid of any debris.
- Divide the whites and yolks into different containers, beat them separately from each other.
- Pour lemon juice into a bowl of proteins, it will facilitate and speed up the whipping process. First, set the mixer to a low speed, and under these conditions work the mass for about 4 minutes. Once it's airy, start adding the powdered sugar.
- After 3 minutes of vigorous beating, you will notice that the mixture becomes denser, and steady peaks appear on the surface. This suggests that there are no more than two minutes left until the end of the process. Keep the speed high, this will help you get a smooth and homogeneous protein foam.
- You can check how well you whipped the whites using a simple trick: if you turn the bowl upside down, then the mass will not flow out of it, it will remain in its place. However, beating for too long will not be beneficial, because the proteins will flow and it will be impossible to correct the situation.
- Add the yolks one at a time to the protein foam. You need to stir the mass with a spatula, making careful movements. In no case should you beat the dough with a mixer, otherwise air bubbles will burst, and the biscuit will not rise in the oven.
- Sift the starch and wheat flour through a sieve and spoon into a bowl. Using a bottom-up motion, stir the dough until smooth, then pour into a large split pan. It is better to cover the bottom of the mold with parchment paper, this will help you remove the biscuit faster and easier.
- Smooth out the dough with a spatula and send to bake in an oven preheated to 180 degrees. I do not advise making the temperature higher, as a dense crust forms on the surface of the biscuit. It prevents moisture from evaporating and prevents the cake from baking well.
- Do not open the oven door for 30 minutes, otherwise the dough will settle and the finished sponge cake will have a dense structure. To make the biscuit porous and airy, observe its condition through the window and check readiness only after half an hour.
- If the crust is well baked, leave it in the turned off oven for a few more minutes, then transfer to a wire rack and cool.
- Cut the biscuit lengthwise into two parts.
In the meantime, tinker with the cake cream and strawberry puree:
- Put the berries in a colander and rinse under running water. Use a paper towel to remove moisture.
- Cut the strawberries into several pieces, place in a bowl and sprinkle with sugar.
- After 20-30 minutes, mash the berries with a fork and leave for another half hour. Do not pour out the released juice, it will come in handy for impregnation, so a biscuit cake with sour cream will turn out to be softer.
- To make sour cream for cake, refrigerate sour cream and beat with sugar until smooth and fluffy. Dissolve the instant gelatin in hot water and mix cool with whipped sour cream.
Getting started with sour cream cake:
- Place half of the strawberry puree on the first crust and pour ½ the juice.
- Separate a small part from the sour cream; you will need it to decorate the sides and surface of the biscuit. Divide the rest of the cream in half and apply to each cake, greased with strawberry puree.
- Apply sour cream to the top and sides of the cake, smooth the surface with a spatula.
- Before serving the biscuit cake, it must be kept in a cold place for one and a half to two hours.
Decorate the sponge cake with cream with strawberry halves and, having brewed aromatic tea, carry it to the table.
You will find recipes for baking with gelatin on the pages of the site.
- If you want the cake to be tall, divide the baked crust not into two, but three or even four parts.
- Another tip that will help you prepare a delicious sponge cake with cream: whisk sour cream with granulated sugar at medium speed and make sure that no grains of butter form.
- In addition to strawberries, you can also use other fruits and berries. For example, kiwi or blueberries. They will add color and make the cake even tastier.
- If the sponge cake with cream was not eaten at one time, it is covered with a cap made of foil and sent to a cool place.
My video recipe
Prepare the necessary ingredients for making the cake. To prepare the biscuit, carefully divide the eggs into whites and yolks.

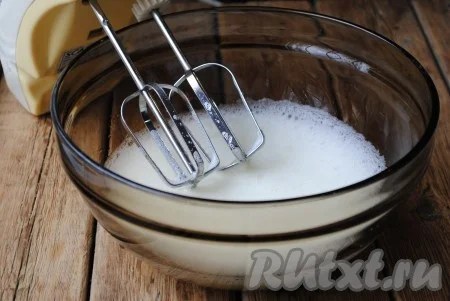 Then, gradually adding 0.5 cups of sugar to the proteins, beat the proteins until persistent peaks.
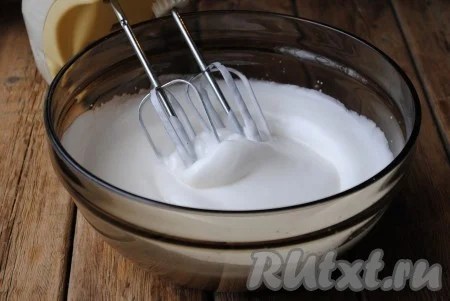 Beat the yolks separately with the remaining sugar until the mass is whitened and increases in volume. Add the whipped yolks to the whites.


Cover a baking sheet with parchment and pour out the dough, level it with a spatula. Send the baking sheet with the dough to the preheated oven and bake the biscuit for 15-20 minutes at 180 degrees. The baking time depends on your oven. The crust should be lightly browned and dry on top, not sticky. Remove the finished biscuit from the oven, free from parchment and cool.
 To prepare sour cream, you need to combine sour cream (it is better to take sour cream with a fat content of 20%, but sour cream with a fat content of 15% will do) with powdered sugar (adjust the amount of powdered sugar to your liking) and beat with a mixer until a homogeneous consistency.
 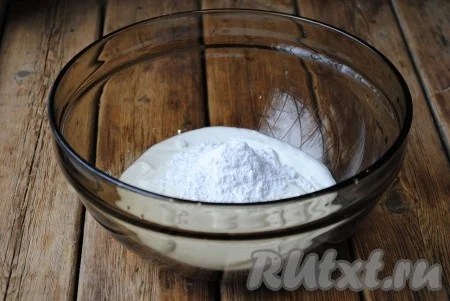 Cut the cooled biscuit cake into two equal parts.

 Peel banana and kiwi, cut into thin slices.
 Grease one biscuit cake with sour cream, put fruits on top.
 Grease the second crust with cream and lay on top of the fruit (dry side on top). Then coat the top and sides of the sponge cake with sour cream and send to the refrigerator. After soaking, the cake can be decorated to your liking and served. I suggest decorating it with a protein custard, which will make the cake especially elegant.
 To make the protein custard, carefully separate the whites from the yolks. We won't need yolks. Combine sugar with water, put on fire and cook the syrup, stirring until it boils, then reduce the heat to a minimum and cook for 7-8 minutes without stirring. To check the readiness of the syrup, a small amount must be poured into cold water, if it rolls into a ball, it is ready (this is the so-called "soft ball test").

 Fill a pastry bag with a nozzle with cream.
 Remove the cake from the refrigerator and decorate with protein cream. For beauty, I put more fruit on top: kiwi and peeled mandarin slices. The most delicate sponge cake with fruit and sour cream is ready. Send it to the refrigerator for a couple of hours so that the cakes are soaked and can be served on the table.
 Bon Appetit!
- For the dough, beat the margarine (softened) with sugar, add sour cream. Then add flour and baking soda. Mix. Knead an elastic dough, then divide it into 4 parts. Roll each ball into a circle about 1-1.5 cm thick and bake in an oven preheated to 200 degrees for 10 minutes. If the baking sheet is large, then you can bake all the blanks in one go.
- For the cream, mix the fat sour cream with sugar and beat until fluffy and thick. After the cakes have cooled down, you can start collecting the cake. Spread cream on the first cake and lay a layer of peeled tangerines, cover them with cream on top. Lay the second cake layer, cover it with cream, then pineapple pieces and cover them with cream.
- Do the same with the third cake, use kiwi. Next, put the fourth cake and pour over it with a thick layer of cream. Grease the sides of the cake and smooth everything well. Decorate the finished cake as you wish (grated chocolate or sweets, fruit or chocolate chips). Be sure to put the sour cream cake with fruit in the refrigerator so that the cake is well saturated.