Forms of buns at home. Bun Shapes: How to Make Beautiful Yeast Dough Bun Shapes
1. Always add diluted potato starch- rolls and pies will be fluffy and soft even the next day.
Main condition delicious pies- fluffy, well-risen dough. Before kneading the dough, flour must always be sieved: it is loosened, impurities are removed from it, and it is enriched with atmospheric oxygen
2. In any dough (except for dumplings, puff, custard, shortbread), that is, in the dough for pies, pancakes, bread, pancakes - add a full tablespoon (with a slide) of semolina for 1/2 liter of liquid.
The nuns taught: “Before, the best quality bread was made from grains. It did not dry out for a long time and was magnificent. Now there is no grains. Now add a handful of semolina and there will always be good baked goods". Here is such an invaluable piece of advice.
3. In addition to milk, it is useful to add 1/2 cup of sparkling mineral water to the dough.
Dissolve a teaspoon of baking soda in 1/2 cup of water and extinguish it slightly citric acid or vinegar.
The pastries are excellent. Even the next day remains lush.
4. There should be no draft in the room where the dough is cut: it contributes to the formation of a very dense crust on the cake.
5. When mixing yeast dough all food must be warm or room temperature, food from the refrigerator slows down the rise of the dough.
6. For yeast products, the liquid should always be warmed up to 30-35 o С, since yeast fungi in a liquid with a lower or higher temperature lose their activity
7. When kneading the dough, hands should be dry.
8. Before placing yeast dough products in the oven, they are allowed to stand on a baking sheet or in a mold - to come up within 15-20 minutes.
Allow the dough to separate completely before baking. With incomplete proofing, it does not rise well and the pies are not baked for a long time.
9. Bake the pies on a baking sheet over medium heat (180-190 o C) so that the filling does not dry out.
10. It is best to add to the dough (yeast and fresh) butter as the melted butter degrades the structure of the dough.
11. Pies cooked in milk are tastier and more flavorful, the crust after baking is shiny with a beautiful color.
12. The yeast for the dough should be fresh, with a pleasant alcoholic smell. Test the yeast beforehand. To do this, prepare a small portion of the dough and sprinkle with a layer of flour. If cracks do not appear after 30 minutes, then the quality of the yeast is poor.
13. With an excess of sugar in the dough, the pies will quickly “brown” and even burn. Also, excess sugar slows down the fermentation of yeast dough, and the pies are less fluffy.
14. Fats, softened in heat to the thickness of sour cream, are added at the end of kneading the dough or when kneading it, this improves the fermentation of the dough.
15. To make the finished pies more tender and crumbly, put only the yolks in the dough.
16. Tall cakes are baked over low heat so that they are evenly baked.
17. Roll out the dough for the pie baking on the baking sheet as thin as possible so that the filling tastes good.
18. To keep the bottom of the pie dry, lightly sprinkle the bottom of the pie with starch, and then lay out the filling.
19. Neither the dough nor the dough should be allowed to stand, as this causes peroxidation and deterioration in the quality of the dough. Enough 3 hours, but always warm.
20. Pies made from yeast dough can be greased with milk, and, if desired, sprinkle on top with salt, poppy seeds, cumin.
21. Closed pies grease before baking with a beaten egg, milk, sugar water. Thanks to this, an appetizing gloss appears on the finished cake. The best shine is obtained when lubricated with yolks.
22. Pies, which are sprinkled with powdered sugar, are lightly greased with butter before sprinkling - it gives them a pleasant aroma.
23. Pies smeared with egg white or yolk acquire a shiny golden brown crust during baking.
For a brighter color, add a little sugar to the grease. When caramelized during baking, sugar will give the surface of the products a beautiful reddish tint.
Lean pies can be greased with very strong sweet tea before baking.
24. The more fat in the dough and less liquid, the more crumbly the products are.
25. If you put soda into the dough, then the cake will turn out to be a darker color with an unpleasant odor.
26. Thin dough easy to roll out by wrapping the rolling pin with a clean linen rag
27. If the dough is too wet, place a sheet of parchment on top of it and roll it straight through the paper.
28. Pies from shortcrust pastry should be removed from the molds chilled.
29. Before adding raisins to the dough, it must be rolled in flour.
30. Salt is always added to flour only when the dough has already fermented
31. The more fat in the dough and less liquid, the more crumbly the products are.
32. When cutting buns, grease the dough pieces with butter and evenly sprinkle with sugar.
The more sugar, the more "caramel" the bun will be. Usually, 1-1.5 teaspoons of sugar and 1 teaspoon of butter are taken for a cake with a diameter of 15 cm.
For sprinkling, in addition to sugar, are used: poppy; cinnamon; small raisins; crushed nuts; sesame or sunflower seeds.
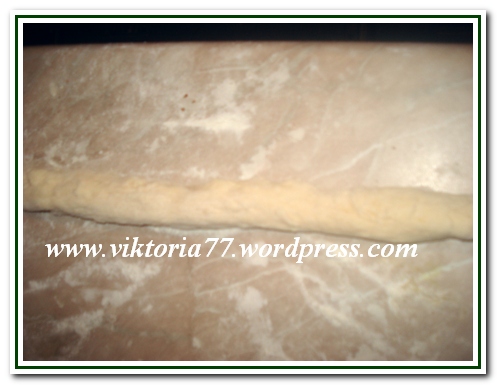
Roll the prepared cakes into rolls. This is the main blank of the bun.
Further, the cutting of buns can go in different ways.
33. If the dough has already come up, and you do not have time to put it in the oven, cover the dough with well-moistened paper, after shaking off the water from it.
34. The more fat in the dough and less liquid, the more crumbly the products are.
35. It is better not to cut a hot pie. But if necessary, you need to heat the knife in hot water, quickly wipe and cut.
36. If the cake is not removed from the baking sheet, separate it from the baking sheet with a thread.
Recently, a large number of buns had to be made, but I really did not want to bake one form. You needed enough variety to like the buns and the kids. On the Internet I came across a book for a vocational school “ Step by step instructions on the formation of buns "I just made several types on it. I think that this material will be useful to someone. The buns were made according to the recipe Magic cream dough
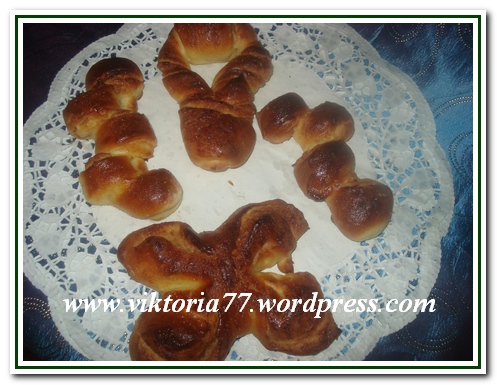
Bun "Swan"
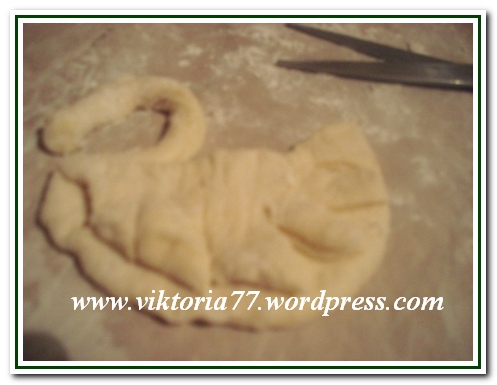
Form a ball from a piece of dough and roll it into a circle. Fold this circle in half.
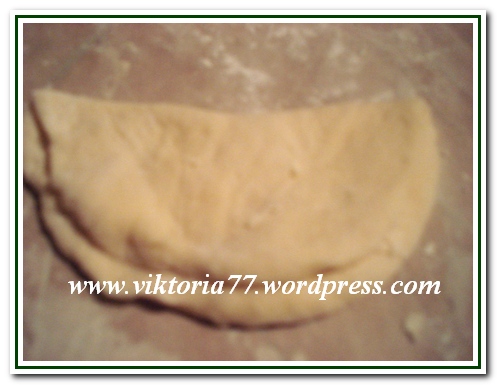
Along the fold line at a distance of 3 mm from the fold, cut a thin strip with scissors without cutting to the end. This will be the neck with the head. Make small cuts along the bottom of the semicircles.
Mushroom bun
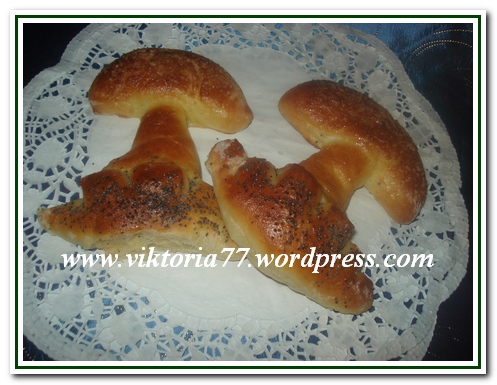
Form a ball from a piece of dough and roll it into a circle. Cut the circle into 3 parts: 1 triangle in the center and 2 half circles.

Put a triangle on the parchment, on top of it one semicircle - a hat, make cuts on the lower semicircle, put it on the base of the fungus and push it a little - it will be grass.

"Buns with jam"
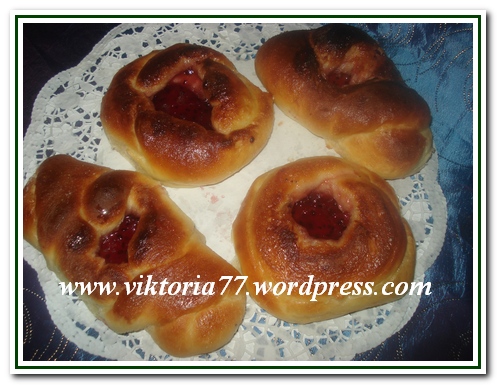
Round open: Roll out a small circle, cut a smaller circle in the middle - this will be the base.
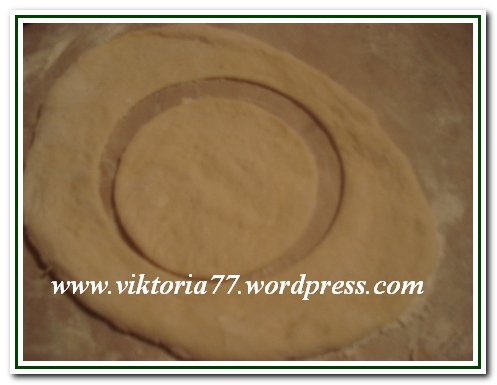
Fold the round strip in a figure of eight, then in half and lay on top of the base.

Fill the inside with jam.

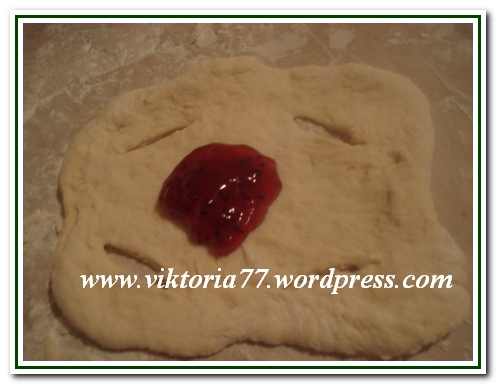
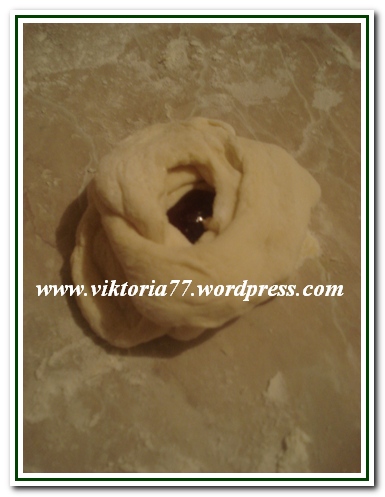
Another option with jam.
Make cuts cross to cross, put jam in the middle and close cross to cross, stretching opposite edges into the cuts.

Bun "Tulip"

Roll out a rectangle from the dough (if desired, grease and sprinkle with sugar and cinnamon). Roll up into a roll. At the roll, make two through longitudinal cuts, without cutting to the middle of 1-2 cm.
Connect the resulting strips from one side to form a loop.

Turn the other two ends with a cut up and put the edge under the resulting loop.

Chrysanthemum bun

Roll a long flagellum from a ball of dough and roll it up with a snail.
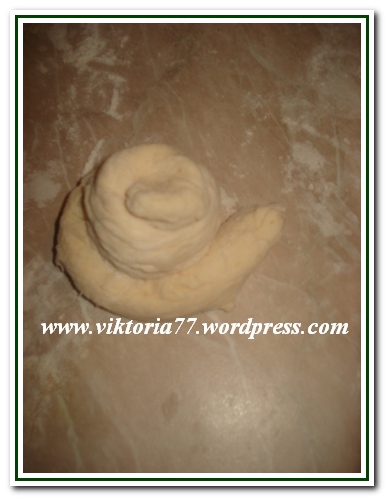
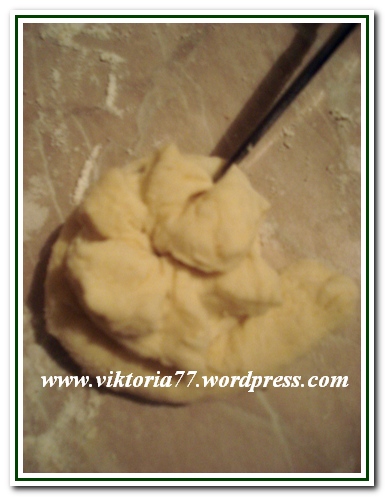
Use scissors to make cuts throughout the "snail". Sprinkle with sugar if desired.
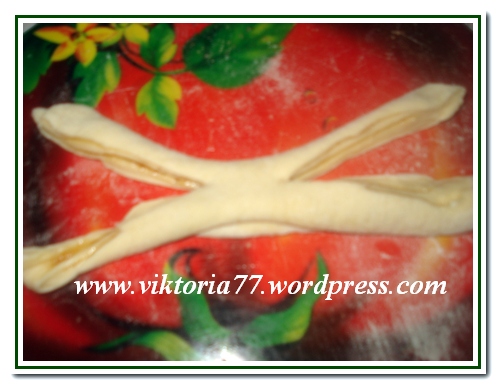
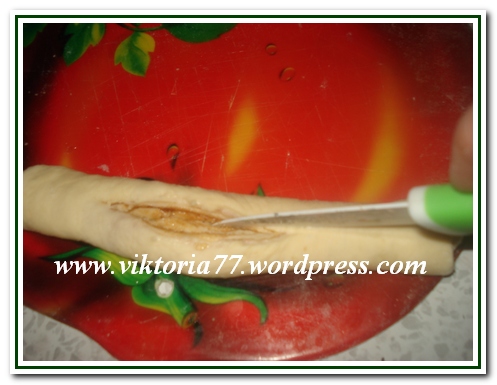
Buns "Vykrutka", "Butterfly", "Scallop"
Roll out a rectangle from the dough (if desired, grease with butter and sprinkle with sugar and cinnamon). Roll up into a roll. In a roll, make a through cut from one edge to the other, without cutting to the end of 2 cm.
Open the resulting hole slightly.
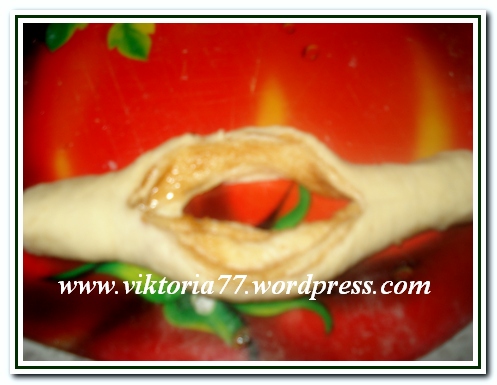
Pull one end through the hole

Bun "Butterfly"
Roll out a rectangle from the dough (if desired, grease and sprinkle with sugar and cinnamon). Roll up into a roll. At the roll, bend the edges to the center so that they join in the middle of the roll.
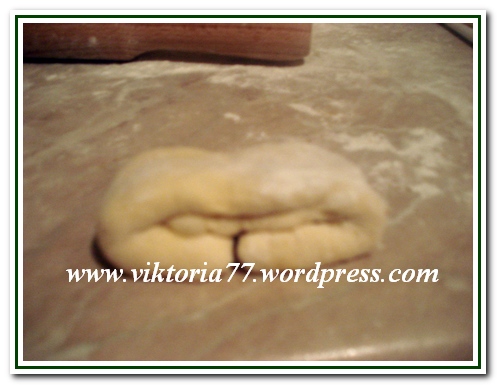
Make cuts at both ends without cutting to the end.
Expand the blank along the cuts of the layer up.
Surely there are no people who would not love homemade buns. Forms are different (we will tell you a little further how to make baked goods), not everyone is able to give such products. Therefore, we decided to devote the presented article to this particular topic. Learn how to make buns, curls and classic buns.
The forms are different: how to do it?
As a rule, they are prepared only from a rich yeast base. In other words, yeast or margarine, as well as granulated sugar, should be added to the dough for such products. After kneading the soft base, cover it with a towel and leave it aside for 80-90 minutes. During this time, the dough should rise several times, become as soft and fluffy as possible.
So how to make different It should be noted that most housewives prepare such baked goods without relying on any recipes. Therefore, you can give one or another shape to the buns at your own discretion.
However, there are also those chefs who prefer to cook only certain baked goods of specific sizes and shapes. Let's consider some of these options in more detail.

Classic products
How to make buns of different shapes? Before answering this question, you should tell how classic round products are formed. To do this, pinch off a fist-sized piece from the rich yeast base, and then grease it with vegetable oil and roll it into a ball. In this form, the semi-finished product is placed in a deep mold, and then all other products are laid out there. At the same time, there is no need to leave this or that distance between them. Indeed, after baking, semi-finished products flavored with oil move very well from each other.
We form buns
Now you know how classic buns are formed. The forms are different (we will tell you how to make buns right now) you can come up with such products yourself. However, in this section of the article, we decided to tell you how to make beautiful and neat buns.
From the approached butter dough tear off a small piece and roll it into a round cake with a diameter of about 12 centimeters and a thickness of 7-8 millimeters. After that, the products are sprinkled with fine sugar and rolled into a tight roll. In the future, it is folded in half, the middle part is cut, leaving the ends in their entirety. Then the product is laid out on a greased baking sheet, having previously opened the cut part of the semi-finished product. From above it is smeared chicken egg and sent to the oven.

Form curls
Before making buns of different shapes, you should decide what kind of products you want to get. If the presence of the filling is not important for you, then you can use the methods presented above to form homemade cakes. Otherwise, it recommends turning your attention to the following method.
So how do you stuff your homemade buns? Various shapes (a photo of the products is presented in this article) can be given to such baked goods very easily. However, we will only consider the fastest and most popular method. To do this, put all the butter dough on a board, sprinkle it with flour and roll it into a rectangular layer no more than 8 millimeters thick. Then the filling is spread on it (for example, poppy, thick jam, dried fruits, fruits, nuts, etc.) and tightly wrapped in a roll. After that, the product is cut into pieces. Their thickness should not exceed 4-5 centimeters.
At the end, the formed curls are laid out on a greased sheet or baking sheet and sent to the oven. At a temperature of 200 degrees, they are baked for 52 minutes, and then carefully removed.
It should be noted that it is according to this principle that the famous cinnabon buns are baked.
Let's summarize
Now you know how you can make delicious homemade buns. Forms are different (how to make buns and curls, we discussed above) it is quite easy to give them. The main thing in this case is to use only a rich yeast base and show the maximum of creative imagination.

By the way, in addition to the options presented, there are many more different ways forming beautiful homemade buns. For example, someone makes them in the form of braids, someone in the form of a sliced loaf, and someone even gives the buns the look of French croissants.
There are already many recipes on the site, but I have not yet had time to tell you how to make buns from yeast dough. And by the way, this is the most popular tea dish in our family. I use the same recipe for buns as I use for baking the rest of the buns.
Having dabbled in cooking simple pastry, you can always make excellent airy buns- buns with sugar, cinnamon, poppy seeds and other additives. Buns can be in the form of butterflies, snails, curls, hearts.

Bun dough recipe
The number of ingredients is indicated for 8 large buns.
For dough:
- Yeast - 25 g pressed or 7 g dry;
- Sugar - 1 tbsp. spoon;
- Flour - 3 tbsp. spoons;
- Warm milk - 250 ml.
For the test:
- Vegetable oil (I use refined sunflower oil) - 0.5 cups;
- Chicken eggs - 1 pc.;
- Salt -0.5 tsp;
- Flour - 3.5 cups (about 400 g);
- Sugar - 3 tbsp. spoons;
Filling for buns:
- Melted butter - 30 g.
- Sugar to taste
- Cinnamon to taste
How to make sugar buns from yeast dough
I prepare the dough for buns in a sponge way.
So, let's measure out 250 ml. milk. 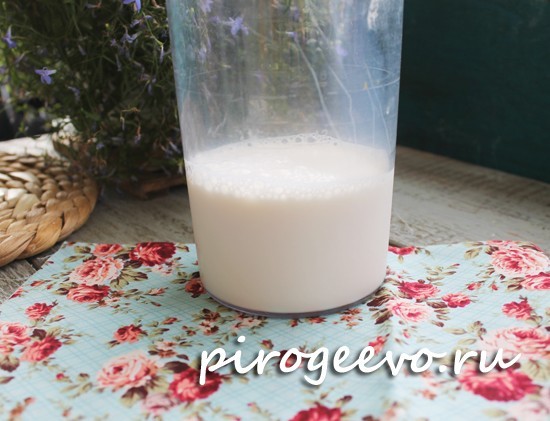
Milk is the basis for our dough, it should not be hot (at a temperature of 50 C, yeast dies, we must not allow this). But yeast will not start working in cold milk, so we heat the milk so that it is slightly hotter than room temperature.
Our buns will be cooked with pressed yeast, break off 25 g.
If desired, raw pressed yeast can be replaced with dry instant yeast, in this case you need to take 7 g of dry yeast.
Knead the yeast with a fork, add 1 tbsp. a spoonful of sugar. 
We send half a teaspoon of salt to the dough for the dough. Crush the resulting mixture with a fork. 
Add warm milk to the dough. 
The yeast should dissolve well in the milk. Mix into a homogeneous liquid mass. 
Add flour (3 tablespoons) to the mixture.
All flour that will be used for yeast dough must be sieved beforehand. This will saturate the flour with air and make the dough more tender and airy.

So, stir the mixture with flour, we get a blank for the dough. 

We remove the dough in a warm place without drafts for 20-25 minutes. You can cover the dough with cling film or a clean towel.
How to cook can be found in a separate article.
How to make bun dough
While the dough reaches the lush foam we need, break the egg.  Add the remaining sugar (2 tablespoons) to the egg, grind.
There is no need to beat the egg with sugar until fluffy foam, just stir until smooth. 
Pour vegetable oil (110 g) into the dough. This is about half of a regular faceted glass. 
Now we need our dough, which has increased in size by this time. 
Tip: The dough recipe can be used to make delicious and other baked goods.

Mix the dough and start adding flour in portions. A small part was added and stirred. Added again, stirred. In total, you should use 3.5 cups of flour. But, given that the flour is different for everyone, you may need a little more or a little less. Focus on the consistency of the dough. 
At first, the yeast bun dough will look like this. 
Then it will be difficult to knead with a spatula or spoon and you will have to put everything aside, proceed to kneading the dough with your hands. 
When the dough becomes thick, spread it on a floured surface and begin kneading with your hands. You need to knead for about 10-12 minutes, until the dough becomes plastic. The dough will be sticky, which is normal. Even if it sticks a little to your hands, there is nothing wrong.
Of course, we can achieve a result with the help of flour so that the dough does not stick to our hands at all, but in this case we will get a dough filled with flour, dense dough, which in ready-made baked goods will not be airy, but heavy.
Then we put the dough in a bowl, grease it on top with a palm dipped in vegetable oil, cover with a towel and put away in a draft-free place for 1.5 hours.
After the allotted time, the dough will increase in size, you need to knead it and send it to the refrigerator for another 2 hours. 

Put the well-fitting dough on a surface sprinkled with flour (or greased with vegetable oil).

Divide the dough by the number of buns you are planning. From this amount, I get 8 large buns. They turn out to be large, lush. So we first divide the dough into two equal parts, then each of the two parts - into two more pieces.

We divide each part by two more, we get 8 blanks for buns.
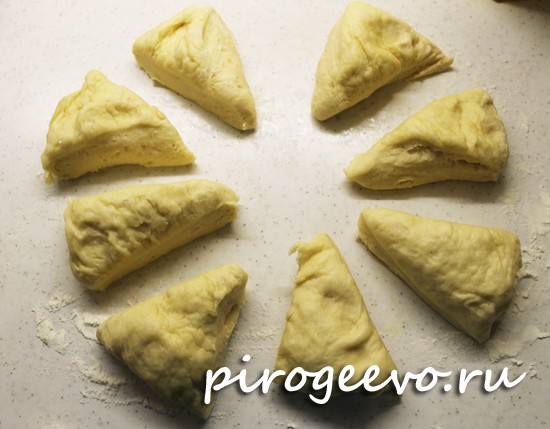
One part of the dough will be one bun, and the shape can be made very different - in the form of hearts, snails, butterflies.
The most popular and romantic are heart-shaped buns.
Buns with a heart
The buns in the shape of a heart are very reminiscent of a bun from Soviet times called the Moskovskaya bun (by the way, they are still sold in stores).
Making a heart out of dough is as easy as shelling pears! Follow my step by step instructions.
So, we roll out a piece of dough from our blanks into a circle. If the shape of an even circle does not work out, it does not matter, the heart from the dough will still come out wonderful. 
Now we grease the entire surface of the dough with melted butter with a brush.
Butter can be substituted with vegetable oil of your choice.

Sprinkle with sugar (you can use cinnamon or Brown sugar). I will use regular sugar.
In the photo, it may seem that the sugar is poured in a heap in one place, in fact, the sugar is evenly distributed over the entire surface.
For a better impression of the sugar, you can use a rolling pin over the dough. 
We begin to roll the cake into a roll. 
We pinch the edge of the roll so that the dough does not come apart. 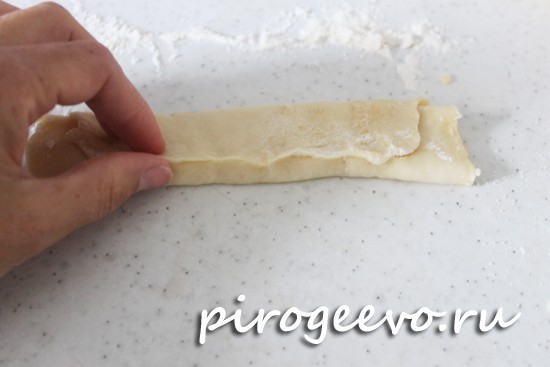
Now fold the roll in half and slightly pinch the edge. 
With a sharp knife, cut through the "plump" part of the roll, not reaching 1.5 cm to the edge.

Now we turn out the cut edges, we get a heart.

V finished form the bun looks like this:
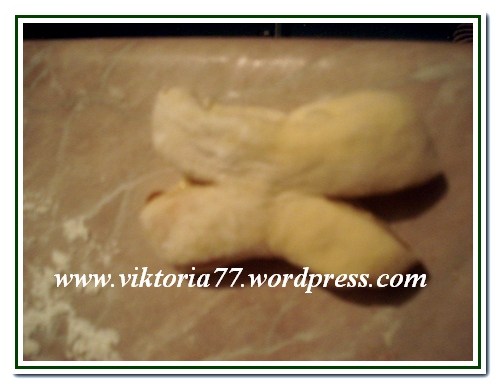
Butterfly buns
Children are very fond of buns in the form of butterflies. You can involve kids in making them: roll the dough into rolls, grease the surface of the dough with oil with a brush - even a child can do this, and the pleasure will be overwhelming!
To make butterfly buns, we do the same steps, roll out the cake, grease it with butter, sprinkle it with sugar, then roll up the roll, pinch it ..

We turn the edges of the roll "under ourselves" and fasten it, as shown in the photo:

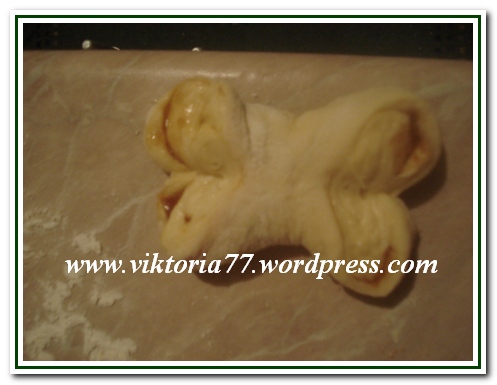
Using a knife, cut the edges of the roll on each side, not reaching the middle of the roll.

We open the wings of the butterfly with the inner side to us.

On the Internet great amount ideas of what shape to make buns and buns. One has only to try once - and a variety of spirals, snails, hearts, butterflies and pigtails will appear on your table. Experiment and please your loved ones! 
Now put the buns on a baking sheet covered with parchment, cover with a towel and let them stand for 15-20 minutes. Before baking, grease with yolk mixed with milk and send to the oven at 180 C.
The oven must be preheated.
After 20 minutes, the buns are ready!
In contact with
There is a sufficient selection on sale today confectionery... Only homemade cakes not even worth comparing with purchased products. Lush and ruddy for tea is the most popular dessert. They are made from yeast, butter, puff pastry, giving them a varied shape, which makes them look even more appetizing.
Wicker pastries
One of the popular forms of buns is a variety of braids. They can be made from different types test and made in the form:
- spindle;
- pigtails;
- spikelet.
Spindle buns are very easy to make. You need to separate a small part from the dough, roll two sausages out of it, fasten them and twist them together. After that, fix the other ends of the flagella so that they do not come apart during baking.
Advice. To make the buns beautifully brown, grease them with a scrambled egg before baking. Also use an egg and milk mixture.
Weaving in the form of a pigtail can be done without much effort. To do this, you will need to roll three flagella from the dough, connecting from one edge to each other. Then braid them not too tightly, and then carefully fasten the edges.

Buns braided into a spikelet also look very attractive. To make such a weaving, you must first roll out the dough in a rectangle. Then, from the sides, cut the layer into strips, not reaching the middle. On the uncut part, you can put the filling (cream, jam or something else), and then alternately weave the strips together. As a result of these actions, the filling will be inside, and a beautiful weaving will cover it on top.
Simple options for buns without filling
Many housewives make cute buns without filling:
- Scallop. Roll up small sausages from the dough, flatten them slightly, on one side make notches with a knife at an equal distance from each other.

- Sun. Roll out the sausage a little so that the dough is thinner than in the previous version. Make the notches thinner too. Then join the edges together, wrapping them in a circle.
- Herringbone. Roll out the dough with a flat cake, cut it into triangles, and make notches on both sides of them. Slightly flatten the ends of the strips with your fingers so that they begin to resemble spruce branches.
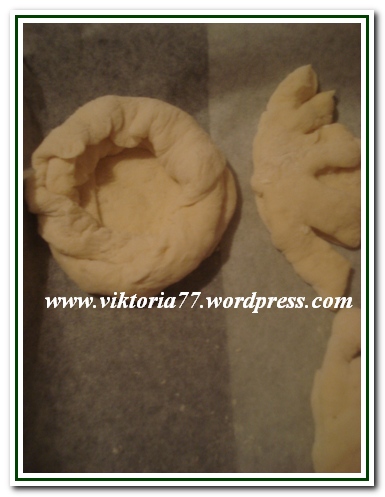
- Chamomile. Form small cakes, make several cuts from the edges, leaving the center free. You can flatten the middle of the bun, then put the jam inside, or bake the product without filling.
- Pretzel. Prepare a thin sausage, wrap both ends inward, then twist one or two times together and stick to the middle of the product.

Beautiful burgers
Not too hard to do beautiful pastries and with various types of fillings, as well as simply with poppy seeds, sugar or cinnamon. Among the most popular forms of buns, there are several:
- Hearts. Grease a small flat cake, rolled out in the form of a square, and sprinkle with sugar on top. Then roll it up into a roll and fold it in half, connecting the ends. Make a longitudinal cut, but not completely, then straighten the edges of the bun.

- Butterflies. Just as in the previous version, prepare a roll, but make cuts on both sides, leaving the middle intact. Then gently unfold the edges. This will make a butterfly-shaped bun.
- Rosettes. Do not roll out a rectangular cake too thinly, grease its surface with oil, and then sprinkle with poppy seeds. Then roll up the layer with a roll, cut into pieces (7-10 cm each). Carefully straighten the edges of each of them, forming roses.

Attention! Roll the dough into a roll, preferably not too tightly. Better to wrap the layer more freely.
- Curls and spirals. A rectangular layer is also prepared for such buns, poppy or other filling is spread on it, but the dough is not wrapped in a roll, but on both sides with an overlap in the middle. Then they are cut into strips across, twisted several times - these are the spirals. If you connect them in a ring, you get curls.
- Envelopes. Cut the dough into squares, put curd or other filling in the middle. Then, forming a bun into an envelope, wrap the edges and fasten them.
Beautiful and delicious buns other shapes can be made. There are a lot of possible options. Everything here depends only on the imagination of the hostess and the skills available. You can start with something simpler, and then proceed to more complex confectionery products.
What kind of buns do you make?
How to sculpt buns: video